6 Speed Transmission with steel oil pan fluid change procedure
A) Notes:
1) If the oil pan contains a lot of metal shavings, then the transmission might already have an internal damage. An oil change will not fix a mechanical transmission problem.
2) Drain and filler plug torque specifications vary by transmission type. Find the appropriate fluid level checking procedures for the transmission application you are working on.
3) Check the ZF lubrication list TEML 11 for the correct transmission fluid to be used. Use of incorrect fluid can cause erratic transmission operation leading to complete transmission failure.
B) Fluid change procedure:
1) Drive the vehicle so the transmission is at normal operating temperature.

2) Drain the fluid by removing the drain plug (see the appropriate fluid level procedures chart for location)
3) After the stream of fluid from the drain plug has reduced to a trickle, loosen and remove the oil pan screws leaving only the corner screws in place.
4) To remove the pan, push and hold it against the transmission housing and remove the remaining screws.
5) Remove any gasket material stuck to the transmission housing or the pan. Avoid scratching the sealing surfaces while removing the old gasket material.
6) Remove the old oil filter. The filters does not have any mounting screws. It is held in place by the oil pan.
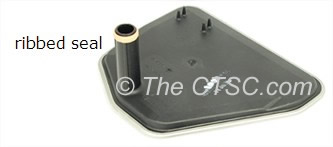
7) Install the new filter, gently push the filter neck into place without damaging the ribbed seal.
8) Clean the pan thoroughly, use solvent and wipe or air blow dry, not to leave any residue.
9) Position the oil pan gasket and install the pan. Place and hand tighten the corner screws first to hold the pan and gasket in place.
10) Install all pan screws and torque to 12NM following a crisscross pattern.
11) Install a new drain plug seal and torque to proper specification. (see the appropriate fluid level procedures chart for torque value).
12) Wipe pan and transmission housing not to leave any oil residue.
13) Follow the appropriate fluid level procedure instruction.